Thank you for installing our product Dose for Excel Add-In.
See how Dose for Excel saves your time in Excel 2021 / 2020 / 2019 / 2016 / 2013 / 2010 / 2007 / Office 365
How to Install Dose for Excel Guide
Screenshot 1: Double-click dfexceladdin.exe file you just downloaded from our Download page.

Screenshot 2: Click on ‘Next’

Screenshot 3: Click on ‘Next’ after keeping the default installation path (Recommended) or changing it to your liking.

Screenshot 4: Click on ‘Install’

Screenshot 5: After the installation is complete, click the ‘Finish’ button.

In order for the “DOSE” tab to show up in the Excel ribbon, please close any open Excel files and then open them again.
Screenshot 6: Open ‘Excel,’ and you’ll notice the ‘Dose’ tab has been added to the Excel ribbon, as shown in the screenshot below.

The ‘Dose’ tab is absent, which is a concern.
If the ‘Dose’ tab does not appear on the Excel ribbon, some files may be missing, and you should attempt the following fixes individually:
1- Re-open Excel and check if it works after downloading and installing Microsoft.NET Framework 4.5 or the newest versions from the link:
Microsoft .NET Framework 4.5
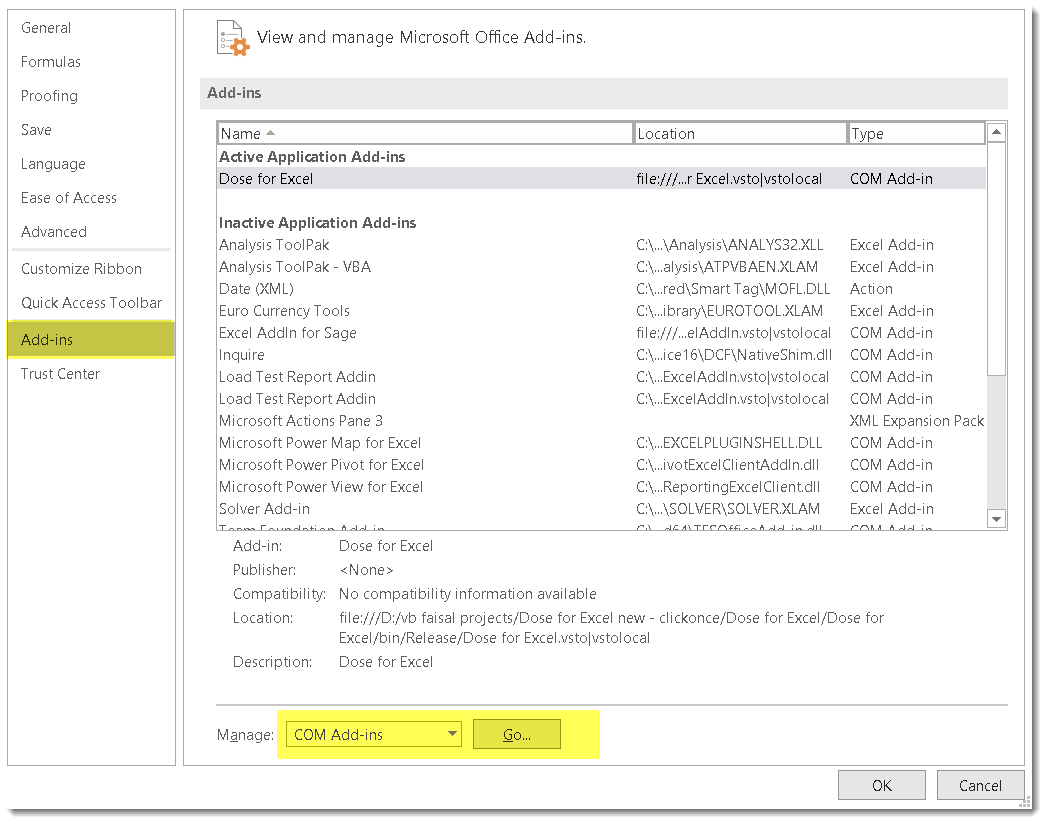
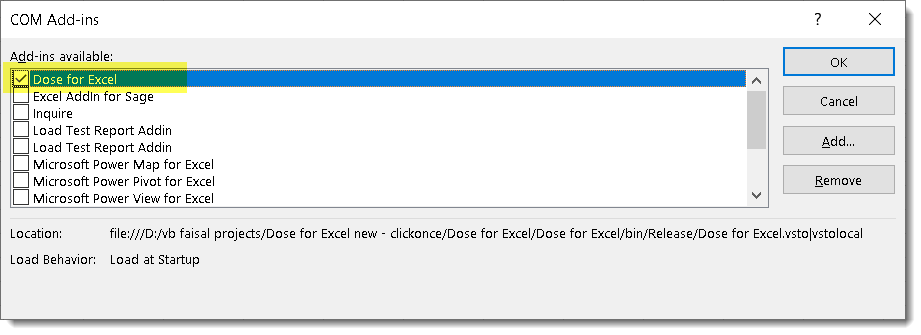
2- If the above doesn’t work, open Excel and go to File –> Options –> Advanced. Add-ons –> ‘Manage’ at the bottom —> ‘COM Add-ins’ –> ‘Go…’ –> ‘Dose for Excel’ is checked. Check to see if it works now.


3- Whether the above fails, download and install the VSTO 2010 Runtime from the following link, then reopen Excel to see if it works:
VSTO 2010 Runtime
We hope this has resolved your problem. Otherwise, contact your IT administrator to see whether your Windows OS has any missing files.